Thursday, December 4, 2014

Salt Dough Ornaments, a 1980's Throwback to Childhood

Simple Salt Dough Ornaments


 Come on, you KNOW you totally did these as kids, right?! I have very fond memories doing these with my middle sister at my Noni and Nono's house growing up. Sigh...those were the days ;) And I'll even go as far to admit that I used to lick the ornaments too....oh yeah, I was that kid. Mmmm salt...mmmm dough...mmmm salt dough! Bahahahaa!

 Every year I like to purchase a keepsake ornament for our tree. This year I wanted to create our own instead of spending the extra cash. Salt dough ornaments are a fun and wonderful way to create memories and traditions around the holiday season with your little ones. The recipe is very simple, and what's best is I guarantee you have all ingredients in your pantry! If you want to add color to your dough, make sure to add the food coloring to your water. I used about 20 drops of red dye to my water for our red dough since we were making candy canes. For your basic white dough recipe, you'll need the following:
1 c salt
 1 c flour
1/2 c water
*Preheat oven to 200 degrees Fahrenheit

 Mix all ingredients together. The dough will be super sticky! My boys had a great time getting their little chubby hands in there to help. With lightly floured hands, take the dough and form into a ball. Then little by little break apart pieces and roll into a long snake. If you are doing a candy cane like we did, you'll want a red and white 'snake.'


The boys needed a little bit of help with the next step. Take both red and white 'snakes' (I seriously need a better name for that...I friggin' hate snakes!) and press the top of the red dough to your white dough. Then, as if you are braiding, twist the two together so it starts to intertwine. See below...


 In order to make the candy cane complete, just take the top and curve it over to make the hook. I placed our salt dough candy canes on parchment paper on top of a cookie sheet. Of course you could also use a Silpat nonstick baking mat as well. Place candy canes in the preheated oven at 200 degree F for 2 hours.


 I initialed each candy cane on the parchment paper so I could later write the boys' names on the back with a sharpie pen and the year. When we do this again, I'm going to put ornament hooks in the top so they will be easy to hang on our tree ;-) But this time around, I'll just hang them with some pretty ribbon or twine. The following day, I applied a layer of Mod Podge to give them a little sheen. Mod Podge is basically a waterbased sealer, glue, and finish all wrapped into one cute little bottle. I use it for 75% of my crafts.

  And there you have it my friends! An easy, at-home recipe that you can do with your kiddos. I love the homemade ornaments we've made so far. It's going to be one of my most treasured memories and traditions to date! I would love to hear what type of salt dough ornament you and your family come up with! Feel free to comment in the section below ;-)


Creatively Yours,
The NorCal Contessa

Friday, November 21, 2014

1, 2, 3, 4, Tell Me That You Want Some More!

Testing...testing...1,2,3. Bueller? Bueller? You guys still there? I've been gone so long but now I'm back!
Oh yeah!!!!!

The holidays being right around the corner, literally snapped me out of my "what the heck should I create?" funk. Thank goodness, too! I'm in the mood to be MERRY people! I'm ready to deck the halls, drink some hot cocoa with cute mini marshmallows, but most importantly, create some really wonderful memories with my boys. So, you're in luck if you're reading this. I've got some really fun and EASY diy ornaments that you can do on your own or with your littles this holiday season. 

Before married life and motherhood, I was a teacher to elementary age kiddos - both general and special ed. There is something about the holidays and school projects that still tug on my heartstrings and I remembered my very first holiday craft! My very first class of kiddos made Applesauce-Cinnamon Heart ornaments. I wish I could remember where that original recipe went? This is super simple and your kiddos can help, which they will LOVE. And your house will smell amazing. And then you can thank me later ;-)

You'll need three main ingredients: applesauce, ground cinnamon, and ground cloves. Heart cookie cutters (I chose three different types of hearts, but you can use any cookie cutter shape you like), and colored string. I bought my string from here.


In a large bowl, mix 1 c applesauce with 1 1/2 c ground cinnamon. Mix with hands or with a spatula until it's well combined. Then add your cloves into the mix. Make sure to scrape down the sides of the bowl and that all the ingredients are incorporated. It might take some time, but who cares! If the 'dough' is too wet or sticky, add a little more cinnamon. If it's too dry and crumbles, add a little more applesauce. Now, take a moment and pause because the smell is so inviting...ahhhh!


I sprinkled cinnamon on the kitchen table to make sure the dough wouldn't stick to my rolling pin etc. Roll out your dough so it's about 1/4" thick. Take your cookie cutter of choice and start cranking out some holiday fun! Once your little hearts are on the cookie sheet, take a toothpick or bottom of a wooden skewer and poke a hole at the top so you can string them later.


My boys loved this part! 
 I laid out my hearts on a Silpat cookie sheet. I love the one I have from here. If you don't have a Silpat cookie sheet, using parchment paper will do the trick as well. Preheat your oven to 200 degrees Fahrenheit and bake for 1.5 hours. The hearts should be rock hard when done. After an hour, I flipped the hearts over and had them bake an additional 30 mins. PERFECTION! And my kitchen...Holy Holidays Batman, it smelled amazing! I need to bottle this smell. I'm sure there is someone out there who has bottled this scent. And guess what...I WANT IT. Anyway, the first thing out of my husband's mouth when he walked in the door from work was, "Wow, it smells really good in here!" Oh yeah, I know ;-) 

                             They almost look good enough to eat, but trust me, it's a really bad idea!


I plan to hang these little ornaments on our tree and around the house as decorations. You can also use them as a darling little addition to gift tags or top a gift with a few of these handmade goodies. It was so much fun to do with my boys. They loved getting their little hands dirty (go figure) and it made me happy to be creating a new tradition with them ;-) 


PS. I'll give you a little hint for my next diy Holiday Ornament post: they are heroes in a half shell.... ;-) 

Creatively Yours,
NorCal Contessa 


Monday, October 13, 2014

The Top 3 Reasons I've Been M.I.A

Good grief.

I mean really.

 You know that saying "When it rains, it pours?" Well, I've been privvy to the rain and it's been more of a torrential downpour, rather than a sprinkling, these last two months. It all started with a crazy back injury at the gym. I was in one of my favorite HIIT classes when we were doing routine deadlifts. Remember the gratitude post I wrote about? Yeah, it was that incident. Well, about three weeks later I was (un)lucky enough to catch some crazy virus. The kind of virus that had me experiencing the following symptoms: dizziness, EXTREME nausea, full body chills, fatigue, low grade fever, and did I mention the nausea? This dang virus lasted two weeks. TWO WEEKS. Um. Not cool. At all. Nope.

 Fast forward to this week and my computer crapped out on me. I'm right in the midst of my busy season with photographing clients for the holidays! DAMN YOU COMPUTER. This ain't the time to go crapping out on me. I mean, I know nothing of computers. I can't pretend, I just don't get "them." Luckily, a friend of mine agreed to help me out. He's currently working on it as we speak. By the way, THANK YOU DALE! Anyway, I was feeling like this black cloud wouldn't leave my side and then it hit me....maybe, just maybe this is all happening for a reason. Perhaps I just need to s-l-o-w the heck down. Maybe I just need to take inventory of all that's around me. Maybe I need to be a little more grateful for what I do have? And maybe, just maybe I needed something like the gym injury, the computer crashing, and the god awful virus to literally smack me upside the head and say, "Hey Nicole! SLOW DOWN. You're going at a 100 miles an hour, it's too much!" Or maybe I just need to channel Simon and Garfunkel's "The 59th Street Bridge Song (Feelin' Groovy)"

Slow down, you move too fast
You got to make the morning last
Just kicking down the cobblestones
Looking for fun and feelin' groovy
Ba da da da da da da, feelin' groovy

Hey guys, I see you. I hear you.

Anyway, I'm rambling. But my point was to explain why I've been away for a while. Thank you to some wonderful followers and fans for your emails and inquiries as to "when will I put up a new blog post?!" I needed that, thank you :) This little 'break' has given me a lot of time to really think about where I wanted to go next with my blog. I've got a lot of ideas! I've got a front door fall wreath to share with you, a pallet sign in the works, a few recipes up my sleeve, and many more diy ideas to share!

Thanks for being there, folks. Thanks for showing you care. And thank you for listening to the rambling. If nothing else, I've learned to bring more positive in and let the negative go. (Which is really hard for this Type A control freak ;-) ) 

Stay tuned in the next week or two - you'll be happy you did!!

Creatively Yours,
NorCal Contessa

Monday, September 22, 2014

I Get By With A Little Help From My Friends...

Hello Friends! 

 So, I missed a week, but had a damn good reason. I hurt myself at the gym - in a MAJOR way. What I thought was a rib out, was really just a super intense pulled muscle, at least that is what the doc thinks. It was the kind of hurt that makes it extremely difficult to breathe, let alone walk. It happened while I was doing a dead lift in one of my group fitness classes. When I came up from the lift, something literally snapped in my back which caused my back to seize up, sent my body into shock, and had me on my ass in seconds flat!! Seriously. That was some INTENSE, scary, and horrible pain! Thankfully my doc put me on some heavy duty drugs last week. This morning I still am tender in some spots, but seem to back on the mend thanks to some really wonderful friends and my mama! 

 I mean, these incredible women picked up my babies from school, cleared their schedule so they could do some bodywork on me, they helped carry me to get in/out of the car, they drove me to the doctor's, then the hospital, they called/texted me around the clock to make sure I was okay. In addition to all of this, my AMAZINGLY WONDERFUL mom ran my roost with ease, a gentle heart, and didn't blink an eye or break a sweat in the process of it all. As soon as I called her to tell her what was going on, she got in her car and was on her way over. How do I ever begin to say 'thank you' to each of you? Thank you for loving my babies when I couldn't. Thank you for staying with me for an entire week, nursing me back to health. Thank you for being so incredibly unselfish when you had enough on your own plate to deal with. THANK YOU.

These women, my dearest of friends, did it all without issue. They did it with love. They helped with a smile. As a whole, they were a well oiled machine! So, today, I'll just make this a personal post and give a great big shout out to those I adore and love. And please know I am so much better and stronger today because of YOU! So, to my Mom, Marce, Michelle, Christie, Miechaela, and Char, my heart is FULL because of you and the unselfish ways you chose to help me last week. It did not go unnoticed. 


Let us be grateful to people who make us happy, they are the charming gardeners who make our souls blossom.
-Marcel Proust

There is a magnet in your heart that will attract true friends. That magnet is unselfishness, thinking of others first; when you learn to live for others, they will live for you.
-Paramahansa Yogananda

And a huge 'thank you' comes from my husband while he was away on business all last week. He thanks you for loving me and taking care of me and the boys when he couldn't. If you don't have solid friendships and love in your life, then you have nothing at all. To my friends and my Mama...Thank you and I love you! 

xoxoxo,
Nicole, aka The NorCal Contessa


Tuesday, September 9, 2014

Bedknobs Without Broomsticks

Bedknobs and Broomsticks. Who remembers that Disney classic? The little boy's bed has been cast with a magical flying spell, and it flies to Naboombu in hopes of saving Mother England. The bed flies, people! What little kid doesn't want to experience flying from their cozy bed? I know I did when I was little. Anyway, this post has nothing to do with the movie itself, but I will talk about my boys' beds! I just needed a somewhat catchy title to get your attention ;-)

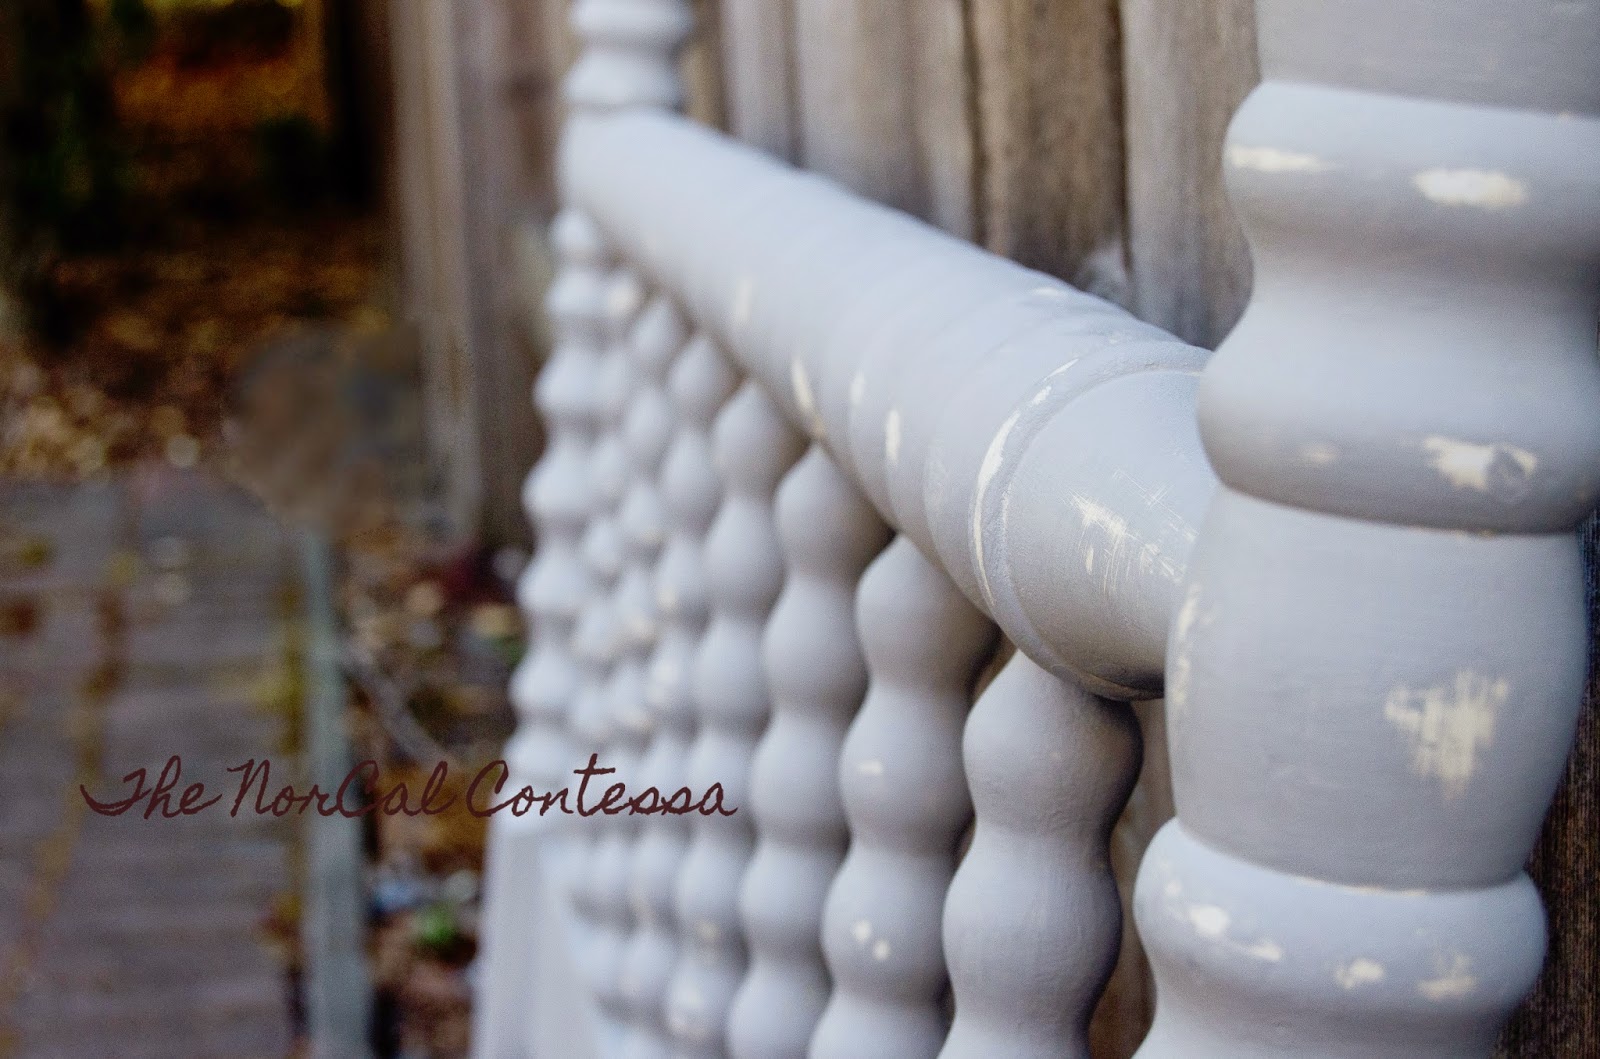
I finally finished the boys spindle beds, just in time for my oldest's 6th birthday! I used the Annie Sloan Chalk Paint in Paris Grey, which is to die for because there is the slightest trace of blue and I love that! Have you heard of Chalk Paint? It's amazing. Let's talk about the product, shall we? Annie Sloan, who is the creator of said paint, is the Queen Bee of the painted furniture craze. Like the name, it has a 'chalky' finish but the beauty of it is that it can be polished to a subtle sheen with a little or a lot of buffering. First coat dries within 10-20 minutes. I know, that's crazy, right?! You'll want to finish off your piece and seal it with furniture wax. Annie has her own wax that she sells, but I just went down to the hardware store and bought Minwax and it got the job done just fine! Here is a little shot of the paint below:


The beds turned out really well. I ended up applying two coats before distressing and waxing with the help of my uber crafty mother-in-law. Although I think I was a little heavy on the distressing. I get so carried away. I sit there, distress, and say to myself "That's awesome! You're awesome!" Then a couple days go by and I think..."huh...you went cray-cray on the distressing." Thankfully it's easy to go back and just retouch the spots that need a little TLC. Then seal it with the wax and you're set. I have fallen in love with chalk paint because of how easy it is to use. It's foolproof! Even the most novice of DIY'ers (ahem...moi) can create the most beautiful of pieces with this paint. There are a ton of chalk paint tutorials on YouTube, but one of my favorites is this gal, Christen from Blue Egg Brown Nest. 


 Fun Fact: These beds have been in my family for 40 years! They belonged to my Noni and Nono, who gave them to my cousins, who then gave them back to my Noni and Nono. Did you follow that? These are the beds my sisters and I used to slumber in, at my grandparents, when we were little girls. Surprisingly, they were in pretty good condition!                


Lucky is really good at pointing out the aesthetics of the bed ;-) 


You can get a little idea of what one of the beds look like. It was so tricky getting both beds in the photo based on the way the room is laid out. Let's hear it for a TWIN mattress...WOOT! WOOT!


 I am really happy with how they turned out. The best part is the boys have REAL beds, not mattresses sitting on the floor anymore, and they are a family heirloom to boot! Yay for us! Now that you've been slightly schooled in chalk paint, you should go out, purchase a can or two, and create something amazing!

Creatively Yours,
The NorCal Contessa

Wednesday, September 3, 2014

All He Wants For Christmas Is His 2 Front Teeth...

This kid.

What.Am.I.Going.To.Do?! He's losing teeth left and right O_o. In the past 2.5 months, this kid has lost 3...1,2,3 teeth. Months ago, the dentist said it was going to happen.
"So Nicole, Mase has 4 loose teeth which will probably all be out by the end of summer. Just wanted to give you a head's up." 
Me: "Huh!?" 
Mase: "AWESOME!" 
Well, Dr. Ray wasn't kidding. All but one of those little Chiclets have dropped out of that handsome little mouth of his. 


So when Dr. Ray told me about this upcoming milestone, I decided I needed to make him a Tooth Fairy Pillow! Don't know what that is? It's a pillow...wait for it...that holds teeth...for the Tooth Fairy to collect! And in return she leaves behind a little George Washington, if you catch my drift ;-) My Italian Noni had made me and my sisters our very own tooth fairy pillows when we were little. I loved that little pillow. It was a scarecrow, in a perfectly stitched straw hat, the bluest of overalls with red and orange little patches in all the right places. The scarecrow's overalls had a top pocket deep enough for a little pearly white to sit comfortably. I can see it now! But what I loved most about it was that she made it. By heart. By hand. It made an impression on me. Anyway, I searched the web for the perfect tooth pillow and hated them all for one reason or another. Until I came upon one of my favorite blogs, Suzanne, over at Just Another Hang Up (justanotherhangup.blogspot.com). She had these darling templates for a tooth fairy pillow. Done deal. I headed out to JoAnne Fabrics, bought some bold colors of fabric and it was game on! Here is our version of Suzanne's "Manfred the Tooth Fairy Pillow:"


It was pretty simple to do. The template called for a 10" pillow, but I chose to make ours a little larger at 12" instead (in case I royally screwed up...which I did in a few places).  I wanted to add a little personal touch and homage to my late Noni, so I hand stitched his name across the top and everything else was done in applique for the most part. So now Mase has a tooth fairy pillow of his very own. I'm excited to make little brother one of his very own soon too! This post is dedicated to my late Noni. For my Noni Eva, who made an impression on my heart and who still inspires me from the heavens above. This little pillow is for you xoxo

Creatively Yours,
NorCal Contessa

Monday, September 1, 2014

1st Things First, I'm The Realest...

Hello? Is it me you're looking for?! Did you just read that in Lionel Ritchie's voice? I sure hope so...otherwise I look like a total weirdo. Hello World, I'm Nicole aka The NorCal Contessa. Yep. I did it. I decided to share my love of everything DIY with a side of photography and cooking (who am I kidding...99.9% BAKING, people!!). I live in Northern California suburbia with my two rowdy boys and kick ass husband. Here I'll try channeling a little mix of Martha Stewart-meets-Ina Garten-with the likes of Ansel Adams. Totally makes sense, right? I know! Let's see if I can pull it off though....!

I've always had my hands intertwined in some sort of project. I LOVE to create. Be it behind my lens (check out me, Nicole Haldeman Photography at http://www.nicolehaldemanphotography.com/ and http://nicolehaldeman.zenfolio.com), constructing and sewing everything baby,  or dabbling in sweet-tooth confections. If I'm not creating, I'm laying on the kitchen floor going "OMGwhatamIgoingtodotoday?" Ha! Anyway, I'm here to create for myself, my family...and FOR YOU! Is there something you see here and you'd like it replicated for yourself or home, just let me know! Stay tuned as I turn up this mutha and add all my favorite projects I currently have going on :)

Creatively Yours,
The NorCal Contessa